If you have not worked on the GoC projects, you might not be aware of what GC Web is, so, in short, it’s an accessible web template/theme that’s been implemented by a lot of government of Canada web sites. As in, have a look at the “canada.ca” to get an idea.
It’s relatively well documented here: https://wet-boew.github.io/GCWeb/index-en.html
And it’s sort of an extension to the wet-boew, which, in turn, has been used by a number of other sites.
Now don’t get me wrong, it’s a pretty good theme, but, for example, it does not seem to support bootstrap5, and even bootsrap4 support is only experimental.
That creates a bit of an issue for Power Pages, since, even though Power Pages are using bootsrap3 in the standard model, they are using bootsrap5 with the Enhanced Model (which is what we should be using moving forward).
Then again, there might be changes coming:
However, all that said, what if we wanted to implement GC Web with Power Pages?
Let’s look at the initial setup in this post, and, then, we’ll make some changes after.
First of all, you will need to put wet-boew and GC Web files somewhere to reference them from Power Pages. There are scripts, css files, images, fonts… You can try adding them directly to your site in Power Pages, but, unless you want to mess with the sources to adjust relative paths, you’ll have to recreate the whole folder structure, and the only way to do it would be to start creating “folder” pages in Power Pages. This is because you can’t use “/” in the partial urls when adding web files to Power Pages, so you have to create a page per folder, and you’ll probably have to create two content pages for each (French and English). Long story short, I have given up on that approach, and, instead, I’d suggest hosting GC Web and wet-boew files outside of Power Pages.
There are two options:
- You can download GC Web and wet-boew release files (https://github.com/wet-boew/gcweb/releases/tag/v15.4.0), unpack them, and put them in the same folder like this:
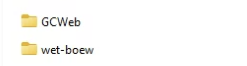
Make sure to preserve this folder structure, since you’ll want all relative paths to work properly.
You’ll need to figure out where to hose these folder so you’d be able to load scripts/styles/images/fonts from them into your Power Pages site. There is a caveat, though: you’ll need to ensure there are no CORS issues, so wherever you are hosting those files, the hosting server will need to add
Access-Control-Allow-Origin “*”
to the HTTP response (perhaps it does not need to be “*”, can be more specific, but still)
- Or, alternatively, if your organization is already using GC Web, you’ll likely just need to find out how to reference an existing version of wet-boew/gcweb, since it would be there somewhere already. This is especially true for almost any government of Canada department.
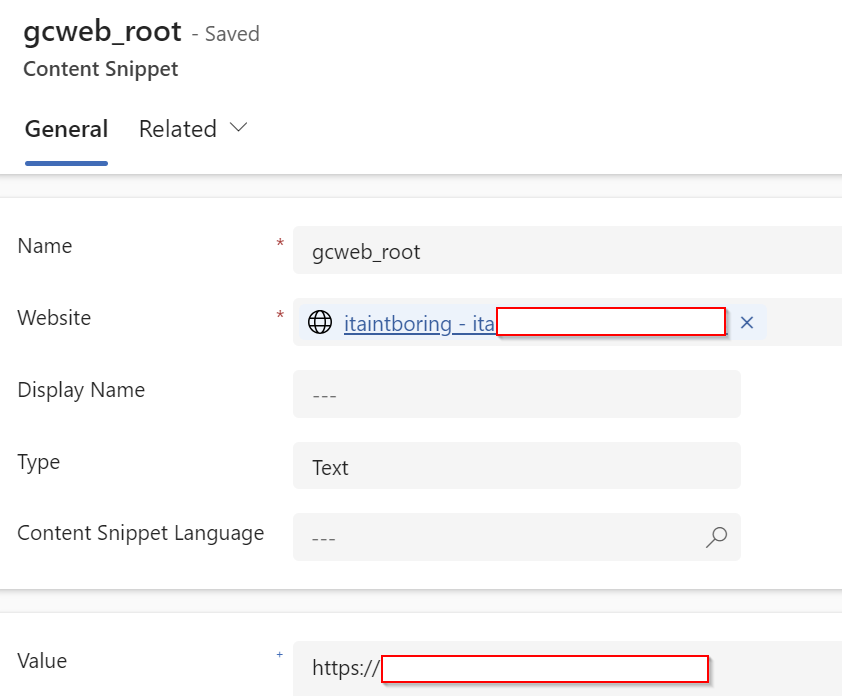
Now, to begin with, add a snippet to the Power Pages site, call it gcweb_root, set its value to the url which points to the folder where both GCWeb and wet-boew folders (see above) are being hosted. So, for instance, you should set it to https://servername.com/wet if your actual url for GCWeb were https://servername.com/web/GCWeb:
Once we have figured out where and how GCWeb and wet-boew will be hosted, and once we have a snipped with the url pointing to the parent folder for those two, we need to set up a few web templates:
- Header
- Footer
- Page Template
And, also, we’ll need to set up Head/Bottom template to add some scripts/css to the “head” element.
Before you proceed, open GC Web implementation page (https://wet-boew.github.io/GCWeb/docs/implementing-en.html) and scroll down to where you see “Static header and footer” section:
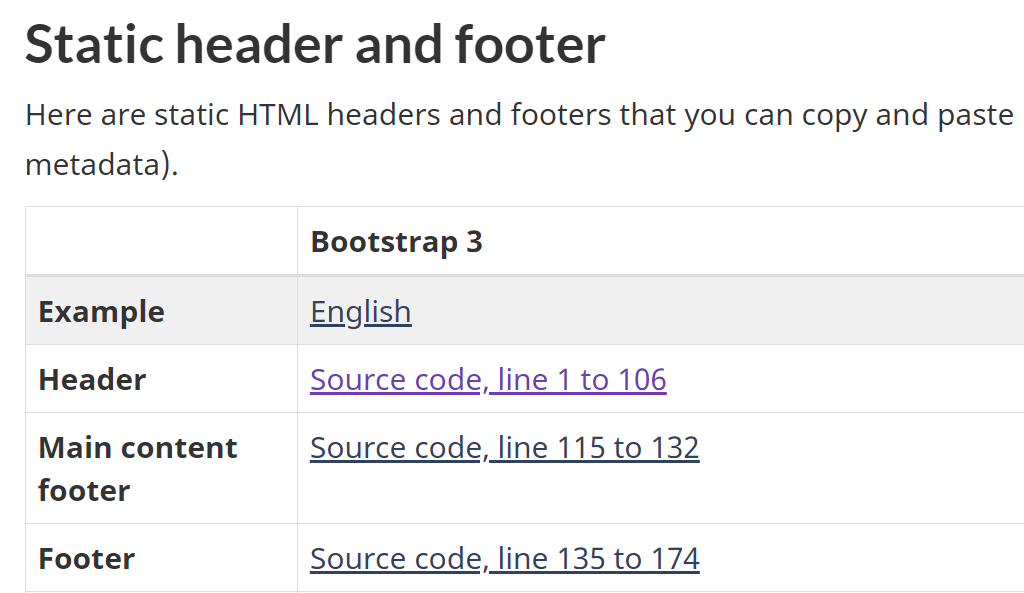
1. To add GC Web header to your Power Pages site
- Click Source Code link in the “Header” line (See above)
- Copy HTML that’ll be highlighted once you open that link, put it in the text editor
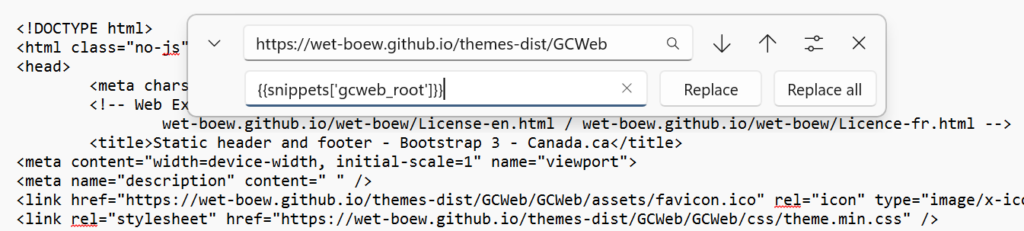
- Apply text replacement as described below:
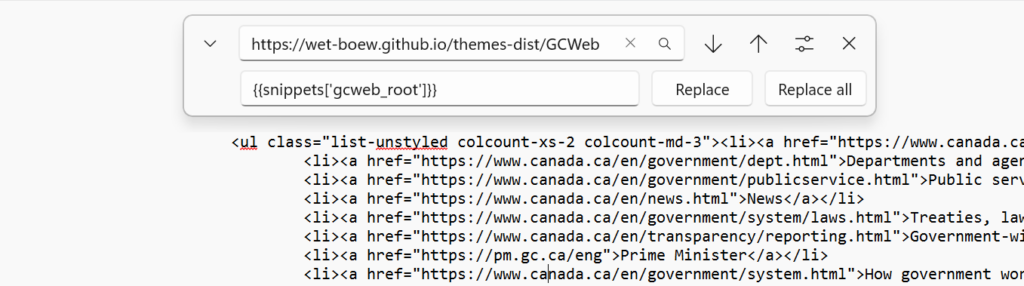
https://wet-boew.github.io/themes-dist/GCWeb => {{snippets[gcweb_root]}}
Use resulting HTML to create a web template for your web site. It’ll be your new header template, so give it some meaningful name, such as
GC Web Header (v15.4.0)
Add this line to the end of your header template:
<main property=”mainContentOfPage” resource=”#wb-main” typeof=”WebPageElement”>
IMPORTANT: Before you save the template, cut the topmost part of the HTML up until the <header> tag and put it aside (in a text editor).
Your header template should start with the <header> tag (not because this is how Power Pages templates are done, but just because you need to add the rest of that template to the <head> portion of the HTML document, and that has to be done using Head/Bottom template instead
Save your header template.
Now add a new content snippet and call it Head/Bottom. If you have one already, you may need to extend it. By default, you likely won’t have one yet.
Assuming you have stored HTML above somewhere, just get that HTML, it should look similar to the code below – you don’t need to keep “body” tag, and you don’t need the part that starts the “head” tag. The purpose of Head/Bottom snippet is to have its content rendered exactly at the end of the “head” HTML element, so, long story short, here is what you need to put in that snippet:
<meta content="width=device-width, initial-scale=1" name="viewport">
<meta name="description" content=" " />
<link href="{{snippets['gcweb_root']}}/GCWeb/assets/favicon.ico" rel="icon" type="image/x-icon" />
<link rel="stylesheet" href="{{snippets['gcweb_root']}}/GCWeb/css/theme.min.css" />
<noscript><link rel="stylesheet" href="{{snippets['gcweb_root']}}/wet-boew/css/noscript.min.css" /></noscript>
Save it, and, them, let’s add a footer.
2. To add GC Web footer to your Power Pages site
- Click Source Code link in the “Footer” line (See above. Ignore “Main Footer” for now)
- Copy HTML that’ll be highlighted once you open that link, put it in the text editor
- Apply text replacement as described below:
https://wet-boew.github.io/themes-dist/GCWeb => {{snippets[gcweb_root]}}
Use resulting HTML to add another web template, call it
GC Web Footer (v15.4.0)
Adjust the version number as needed though.
Now before you are done with this template (at least for now), go to the GC Web implementation page again, navigate to the source code link next to the “Main Content Footer”, copy highlighted HTML starting from the line that says “<!– Static footer starts –>”, and paste it at the beginning of the GC Web Footer template you just added.
Locate <section class=”pagedetails”> line and add “container” class there to align it properly:
<section class=”pagedetails container”>
3. Now let’s add required templates for your pages
Let’s call it GC Web Template, and let’s have the following content for that template:
<main property="mainContentOfPage" class="container" resource="#wb-main" typeof="WebPageElement">
{% include 'Page Copy' %}
{% if page.adx_entitylist %}
{% include 'entity_list' key: page.adx_entitylist.id %}
{% endif %}
{% if page.adx_entityform %}
{% entityform id: page.adx_entityform.id %}
{% endif %}
{% if page.adx_webform %}
{% webform id: page.adx_webform.id %}
{% endif %}
<!-- Main content footer starts -->
<section class="pagedetails">
<h2 class="wb-inv">Page details</h2>
<dl id="wb-dtmd">
<dt>Date modified:</dt>
<dd><time property="dateModified">2024-07-24</time></dd>
</dl>
</section>
<!-- Main content footer ends -->
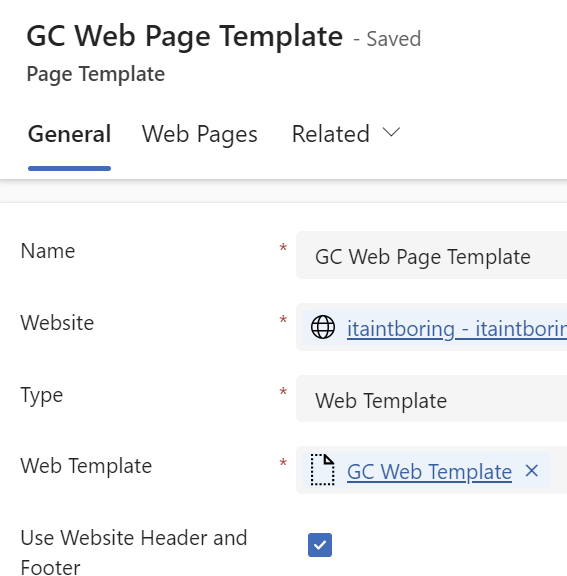
</main>Create a Page Template that’ll be using that Web Template, let’s call it GC Web Page Template:
Now update your web site record to start using the Header and Footer template you created above.
And, finally, update one of the site pages to start using your new page template (or create a new page for testing).
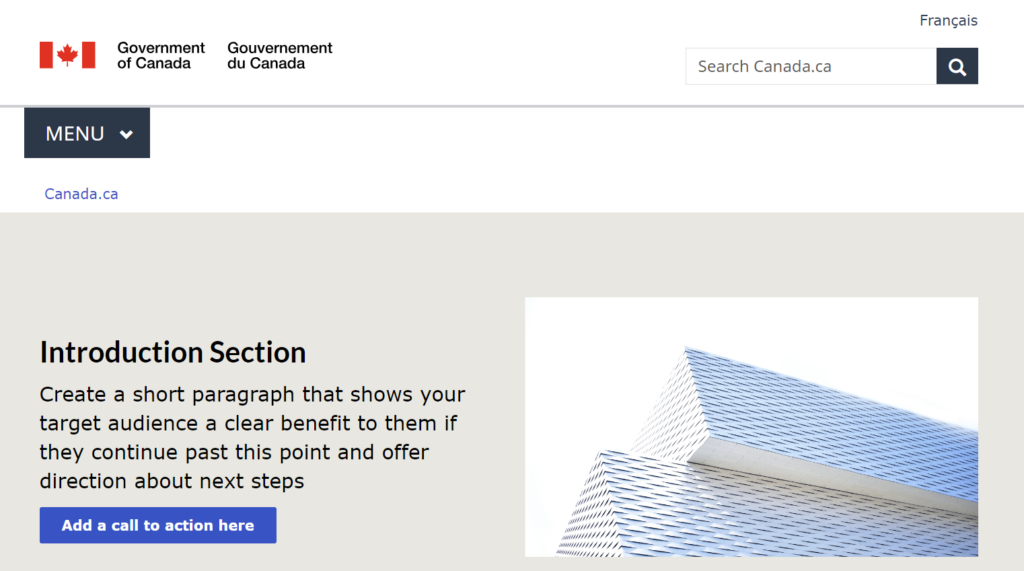
Sync your Power Pages site, open it in the browser, and you should see GC Web theme applied to it:
Now, don’t you worry, we are not done yet. Still need to configure language selector, figure out how to localize various labels for French and English, talk about what to do with the lists and forms, and possibly look at bootstrap3 vs bootstrap5.