Not sure this is 100% accurate, but this seems to be close to how Power Pages rendering works. I needed a bit of a visual for myself, so, perhaps, it’ll help someone else, too:
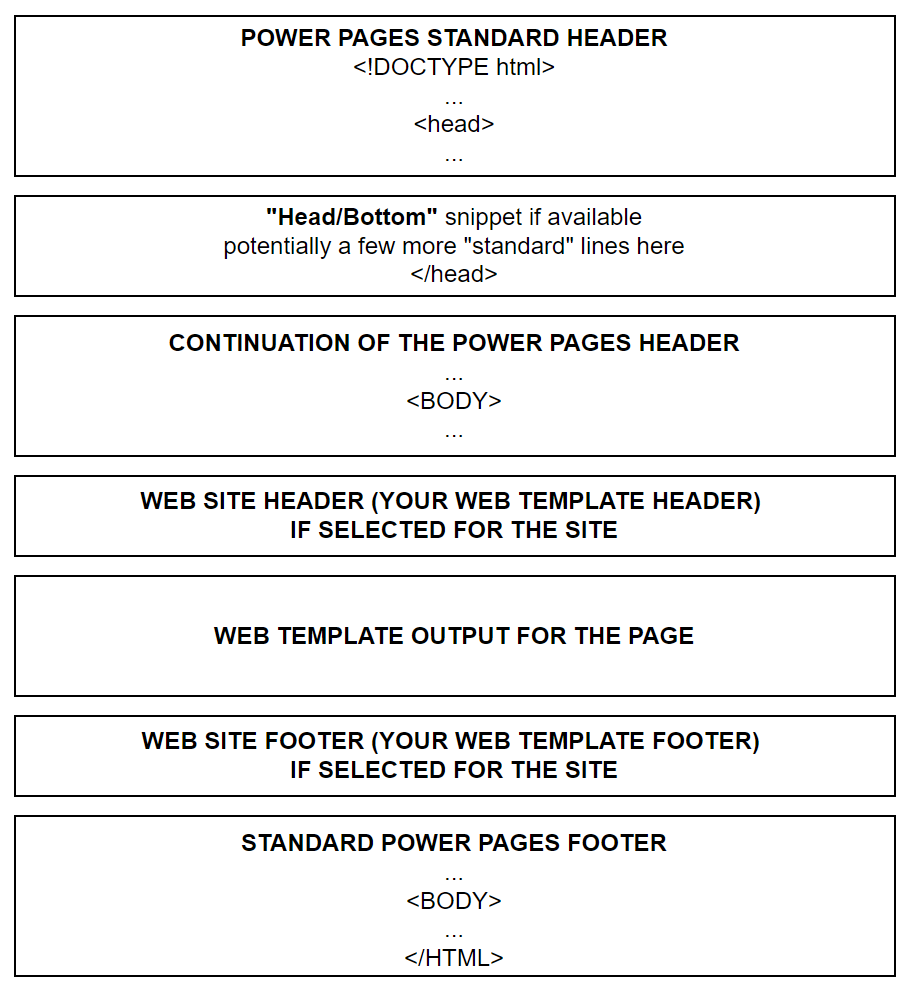
There are a few caveats there:
- What’s called “site header” is not, really, a header. It sort of is, but that part starts after the “standard” header that’s injected by PowerPages
- It’s the same with the footer, so you don’t need to include html and/or body tags, essentially your custom site header/footer templates are just parts of the html body
- Notice the use of “Header/Bottom” snippet there. It allows you to add some extra output to the head portion of the page ( you can find some other semi-hidden snippets in this git repo by the way: https://github.com/OOlashyn/PowerAppsPortalSiteSettingsAndSnippets )
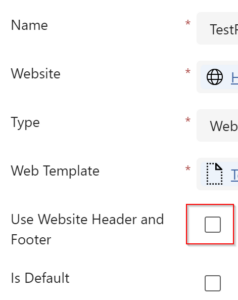
However, if you create a page template and set it up so that it won’t be using site headers:
Then it’s your web template that’s going to be responsible for the rendering from start to end, and the diagram above transforms into this:

In which case you have full control, but you may inadvertently lose something that Power Pages would automatically inject there otherwise.