In the previous post, I did show it off a bit, but how do we actually set it all up? Well, see below, just be ready for a l-o-o-o-ng read.
First things first, what’s the ultimate goal?
- I want to hide my real power pages site address from the site visitors, and, instead, expose it on the “external address”
- For the users trying to access my Power Pages site on that external address, I want them to get authenticated with Azure B2C first
- Once they are authenticated, I want to run an extra check to see if they are “allowed” to access my site (think “subscription-based” access. Besides, I want this to work with pay as you go, and I don’t want anonymous users to just keep roaming around)
- If both of the checks above pass, I want Power Pages site to seamlessly recognize the user (without any additional Azure B2C popups), and, then, to present site content to the user (still through the external domain)
This just speaks “reverse proxy”, but how do I set it up?
And there is one more requirement: no additional multi-hundred dollar bills should show up in my mail just because of this exercise.
Here is what I ended up with, on the high level (I am not even assuming this is the best possible solution, I’m not that proficient in docker, nginx, traefik, etc. But it works “as is”):
- I am using Cloudflare as a DNS server for the external domain. It’s forwarding requests to the IP address of my “host” machine. It also adds SSL certificate to the mix
- Actually, it’s forwarding requests to the IP address of my router, and the router does port forwarding to the host machine
- On the host machine, I have a set of docket components
- It starts with Traefik running on docker, and it’s a reverse proxy listening on port 443 (with letsencrypt-generated SSL certificate). Traefik is doing traffic forwarding to an nginx server which is listening on port 80
- That nginx is running on docker as well, it’s basically introduces yet another reverse proxy, but it’s configured to use “auth_request” directive to authenticate requests
- Those authentication requests a forwarded to the Auth2Proxy local server (yes, another docker container on the same host). Auth2Proxy, in turn, is configured to work with Azure B2C for authentication
- Once the users get authenticated, nginx above passes traffic to yet another nginx server on the same host (port 89). The reason for having two nginx reverse proxies involved is that I can’t use two auth_request directives one after another in the nginx configuration. But I can if the traffic is forwarded from one server to another. So, in the end, the whole purpose of that second nginx is to introduce yet another auth_request which will call my Power Automate cloud flow (does not have to be a cloud flow, can be an Azure Function, a php page somewhere, etc). That flow allows me to do additional validation (so it’s not just Azure B2C, but, also, whether the user, which is authenticated through Azure B2C at this point, is, actually, allowed to access the portal)
- And, finally, the traffic is forwarded to the Power Pages site
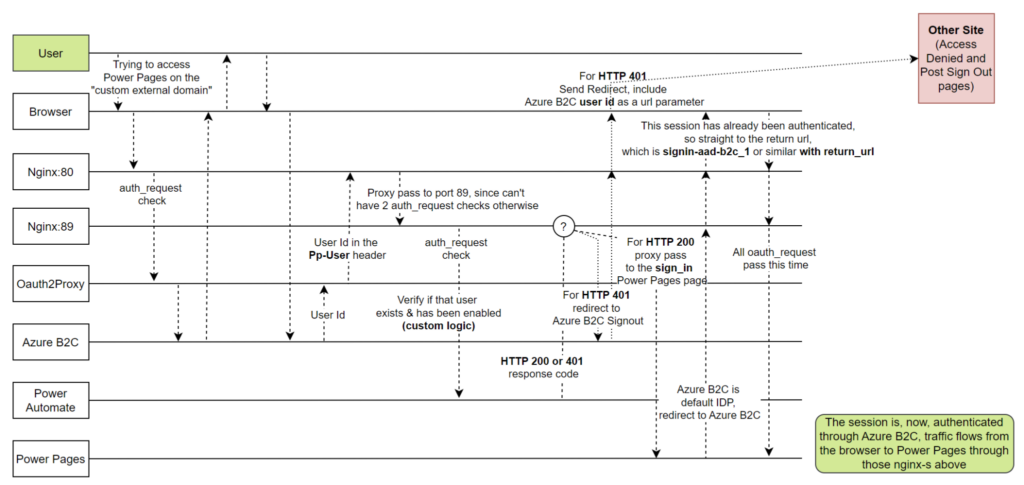
The diagram below may help to understand this a bit better (Cloudflare and traefik components are intentionally excluded, they don’t have a lot of “functional” meaning other than to route incoming request to the Nginx reverse proxy server):
From the configuration perspective, there are two parts:
- We need to configure Power Pages, Azure B2C, and deploy that additional cloud flow (+supporting components)
- We need to set up the “infrastructure” (docker, traefik, nginx, oauth2proxy)
Let’s look at the first item first.
1. Getting your Power Pages site and Azure B2C ready
First of all, you will need to get a Power Pages site, you will need to enable Azure B2C identity provider, and you will also need to configure Azure B2C as a default identity provider.
Here are the links to follow:
- Setting up a new Power Pages site
- Configuring Azure B2C identity provider
- Setting up a default provider
For Azure B2C, you will need to specify a return url. The whole point is to “hide” your actual portal domain/site, so it’s always reverse-proxied, which means you’ll have to decide on the “external” domain name, and you’ll have to figure out DNS settings etc.
For example, here is how I did it (it’s not the only way to do it):
- I have a local desktop PC at home where I’m running docker (Windows->WSL2->Ubuntu + docker desktop in windows)
- I had already been hosting my blog that way (itaintboring.com), and, for the DNS, I was (and still am) using Cloudflare. That takes care of the SSL certificate as well, btw
- It’s worth mentioning that my home router has been configured to do port forwarding to that desktop PC about for ports 80 and 443
- All I had to do for this exercise on top of the above is to create add a CNAME record to the Cloudflare DNS so that portal.itaintboring.com were pointing at the same address

You can have your infrastructure on DigitalOcean, you can have it in Azure, it’s up to you. The goal is to make it so that there is an “external” domain that’s pointing to the physical or virtual machine where your docker is running (we’ll get to the docker later).
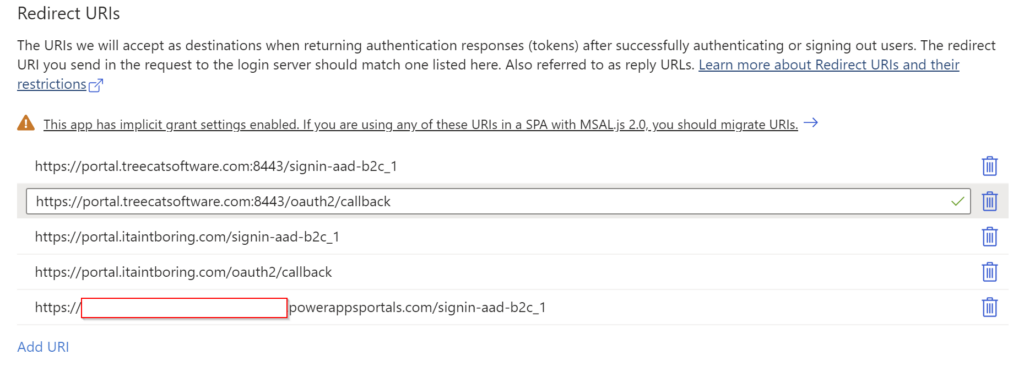
Note: before you continue, make sure your portal works with Azure B2C “as is”. Add the following redirect urls to the application in Azure B2C:
- Add one for the “native” portal domain
- Add another one for the “external” portal domain (just replace domain name in the “native” version)
- And add yet another one which will look like this: https://<your_external_domain_name>/oauth2/callback
See below, I have two sets of “external” domain urls, but, other than that, this should give you an idea of what it needs to be:
With this, test your Power Pages site using it’s “native” domain and confirm it does work with Azure B2C. Since, if it does not, it won’t work with the “external” domain either.
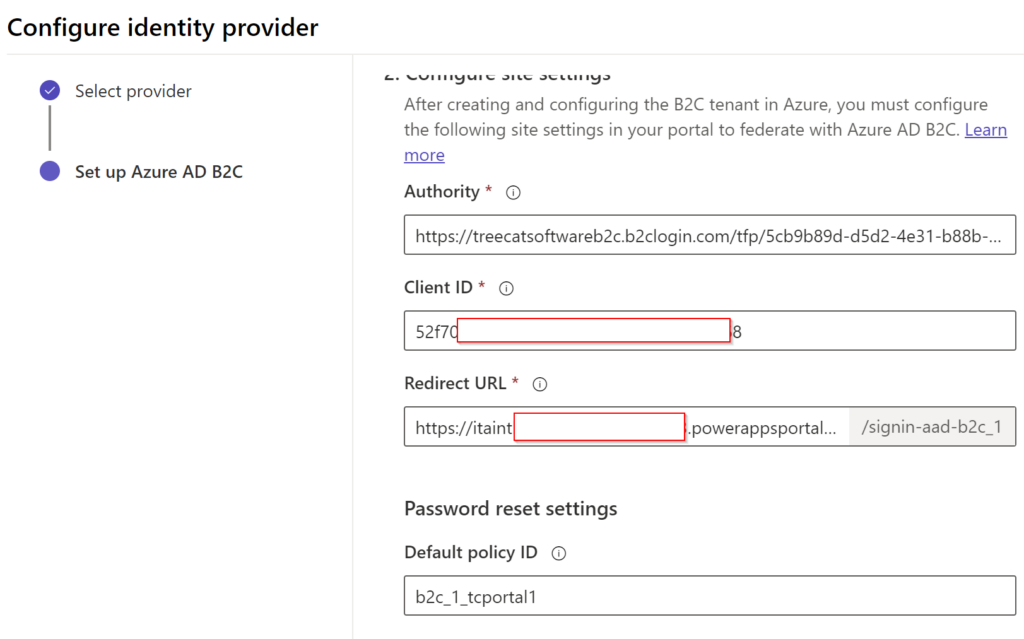
Also, it’s worth noting that, while setting up the identity provider in Power Pages, you should be using “native” power pages site domain, not the “external” one. Eventually, domain replacement will be taken care of on the nginx reverse proxy side:
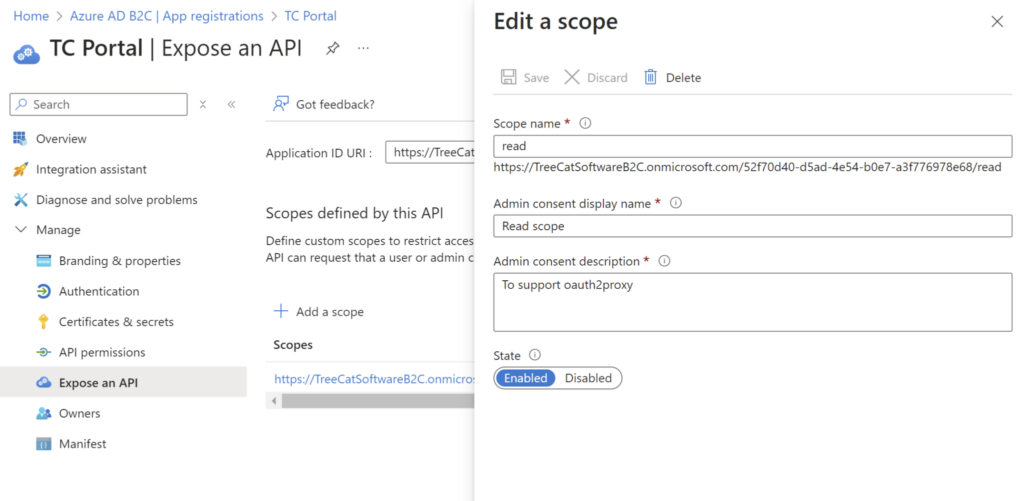
2. Enable custom scope in Azure B2C
This is required, since oaut2proxy will be using authorization code flow, and, in case with Azure B2C, it won’t “accept” this flow unless there is a custom scope to authorize. Setting it up is relatively straightforward – go to your Azure B2C portal, find the application you’ve created there, and add a scope:
After that, add an API permission and grant admin consent:
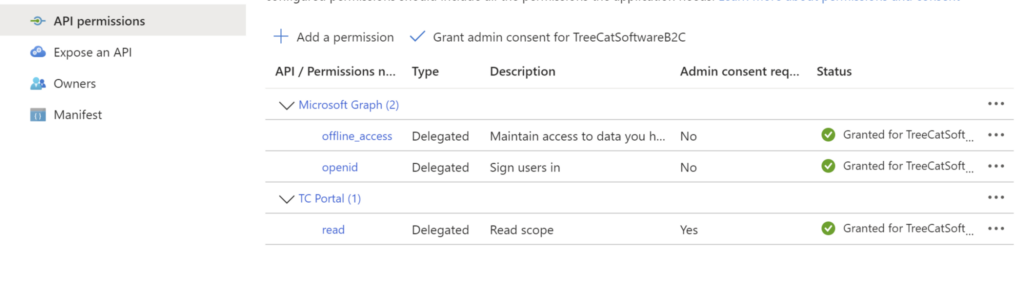
You will now be able to add that scope to the authorization requests, and everything will work with Oauth2Proxy.
3. Other settings
On the Azure B2C side, I have enabled Google identity provider. By default, I think email claim is not going to be passed from Azure B2C to the portal, so make sure to enable Email Addresses claim. Also add User’s Object ID claim if it’s not been added:
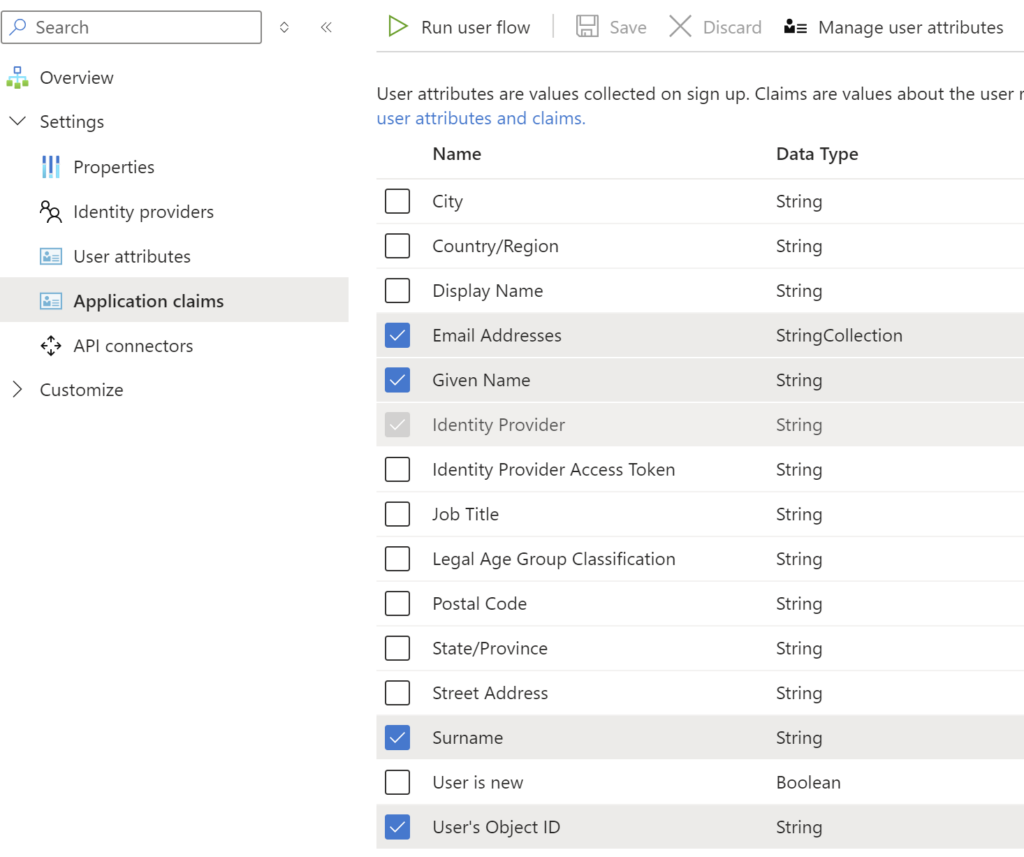
(As a side note, it’s not the same as the usual “email” claim in OpenID, but it seems to work.
On the portal side, I did not want the user to go to the profile all the time after signing in, yet I would not need invitations, so here is how I configured corresponding site settings:
Authentication/Registration/ProfileRedirectEnabled : false
Authentication/Registration/InvitationEnabled : false
Authentication/Registration/OpenRegistrationEnabled : true
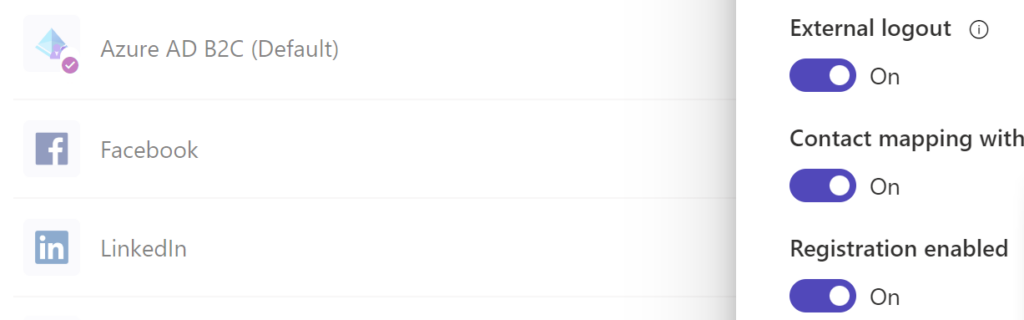
Also, make sure you’ve enabled registration for Azure B2C identity provider in Power Pages:
4. Deploy ITAPortalAddon solution
This solution includes a simple extension to the power pages “native” access rules, and there are a couple of cloud flows. One of those flows is used with the nginx “auth_request” directive to verify access to the portal against the table below:
The other one is used to update records in that table once the user is, actually, registered.
Here is how it works.
When a new user attempts to access the portal, they are sent to the Azure B2C authentication screen where they can register in Azure B2C.
Once registered, they are forwarded back to the “external domain”, this time they are already authenticated through Azure B2C, but the second auth_request calls a cloud flow to see if they are allowed to access the portal.
Since they have not been added to the ITA Portal Access table yet, they are not allowed, so they are forwarded to a dedicated configurable url, and their Azure B2C user id is added as a parameter:
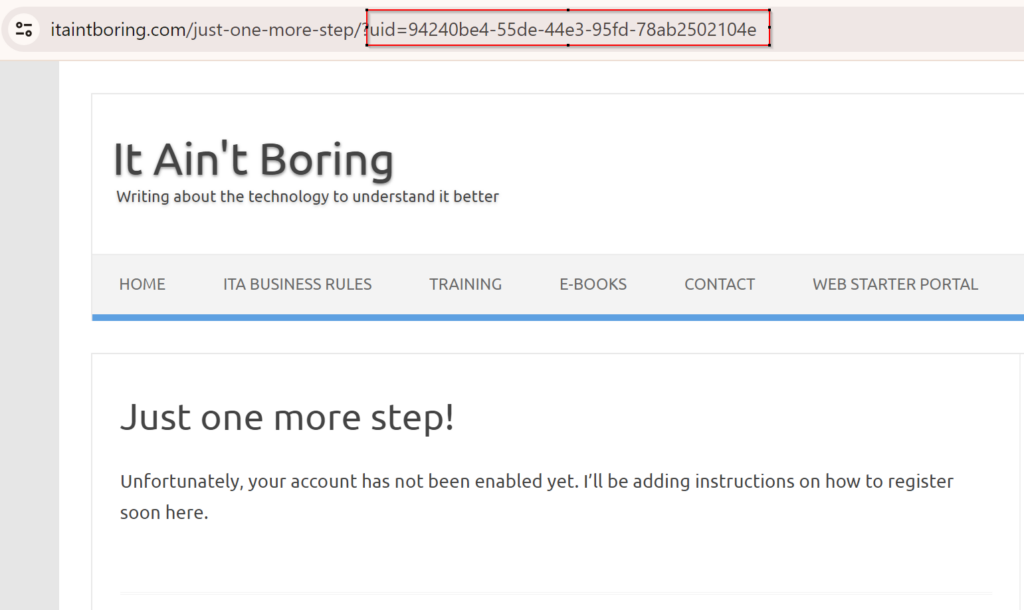
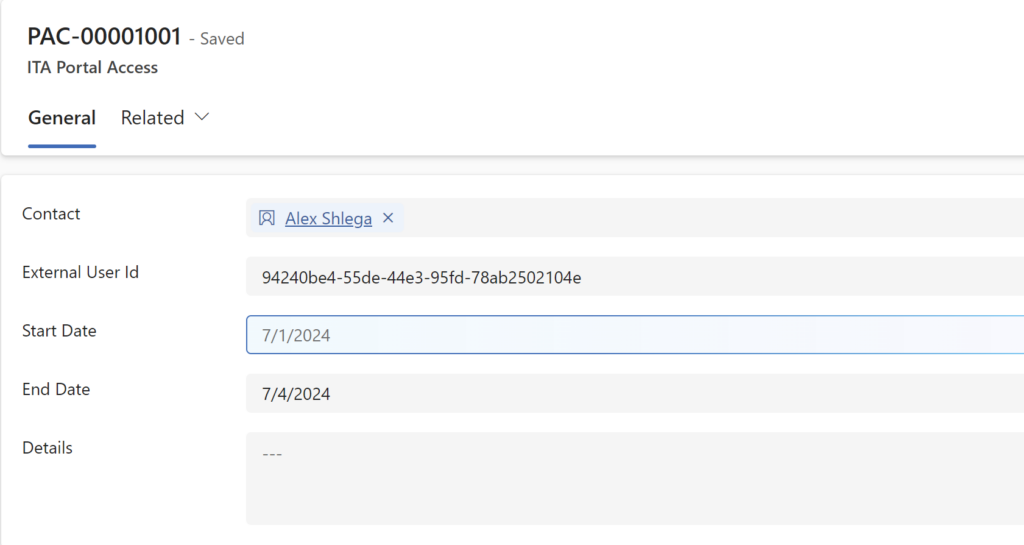
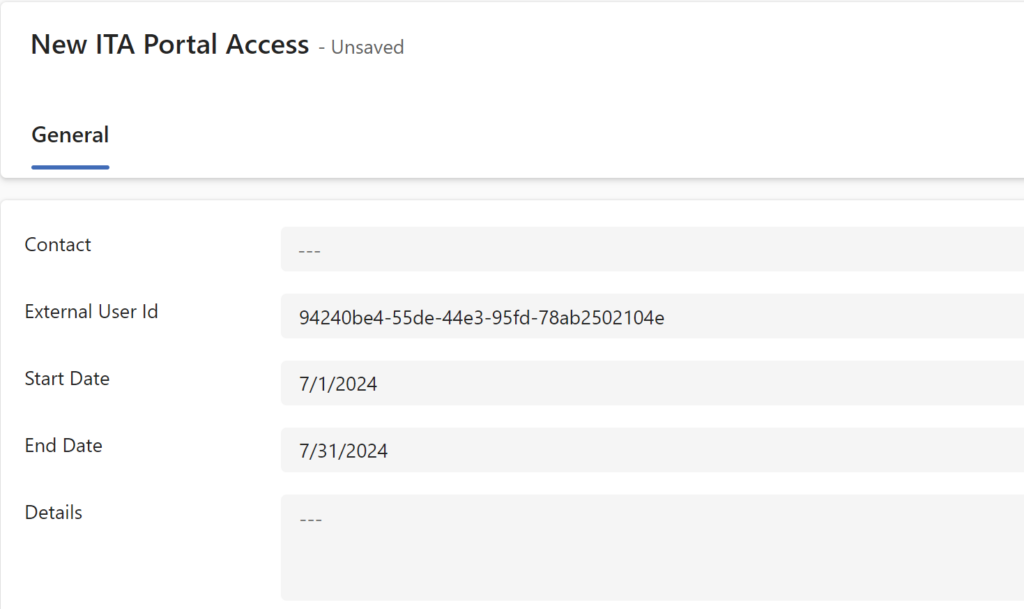
What happens on that page is completely up to you – for example, you might require portal users to subscribe, first, before they are allowed to access the portal. The important part is that there is that id in the url, and, in order for that newly registered Azure B2C user to ultimately get access to the portal, you need to created an ITA Portal Access record and use that id for the “External User Id”:
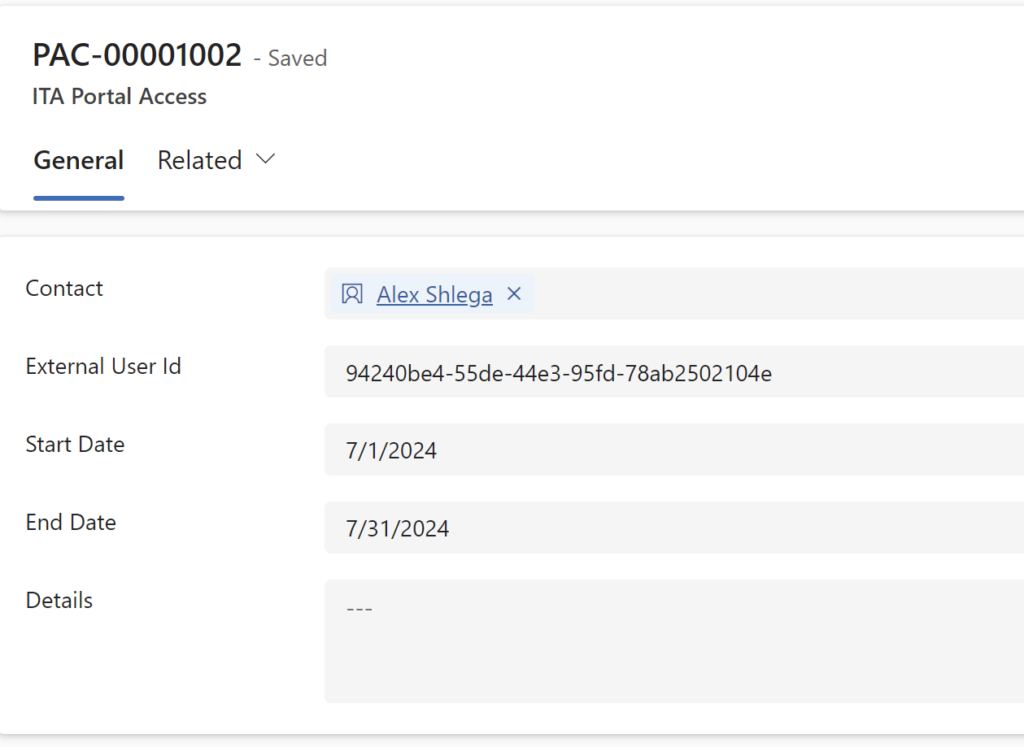
Once that record is created and the dates are set (so, once they’ve subscribed in the scenario above), the user will be able to proceed to the portal, and they will be forwarded to the “SignIn” page.
Since the portal is configured with Azure B2C being the default provider, since OpenRegistrationEnabled is true, and since InvitationEnabaled is false, the portal will create a contact for that user right away. Then it will also create External Identity record for Azure B2C user and link it to the newly created contact.
From the portal perspective, everything will be working now for the user.
Then the second flow in the ITAPortalAddon solution will kick in (on create of the external identity) to link newly created contact to the ITA Portal Access record (which is more for “convenience”, really):
From there on, portal user will be able to access the portal till the “End Date” of the associated ITA Portal Access record (or until their contact gets locked using “Is Locked” checkbox on the contact record).
You will find both managed and unmanaged versions of this solution in the ProxiedPortal/ITAPortalAddon subfolder in git:
https://github.com/ashlega/ITAPowerPlatformExtensions
Having done all of this, let’s move on to setting up required docker components in the next part.